Riemann Sums
The idea of finding an area by approximating a shape with very thin rectangles and adding them up is not only an ancient idea, but one that has extended throughout my life in surprising ways. I want my students to internalize this idea as much as possible, so I made a crafty activity to help them develop this idea, as well as have a little fun.

Timing
- Prep time: A couple hours
- Class time: One full class day
- Curriculum location: introducing Riemann sums
Supplies
- Colored paper, 2 colors
- A paper cutter (preferred) or scissors
- A 1/4 inch paper shredder without a cross cut feature (or scissors and a lot of patience/time)
- Envelopes, one or two per group
- Glue sticks, one per group
- Scissors, one per group
- Rulers, one per group
- Black marker and a marker of a lighter color
- Magnets
- Scotch tape
- Main worksheet
- Worksheet with supplementary figures
Instructor Instructions
Preparation
- Cut one color of paper into 1-inch strips using the paper cutter. Since I used letter-sized paper, I cut it parallel to the short edge so I didn't have waste at the end.
- Use the paper shredder to cut the other color of paper into 0.25-inch strips. You will probably have to throw out the pieces at the ends because they won't be straight.
- Put the strips into envelopes - you can either use one envelope for each group, or give each group two envelopes- one for each type of strip. I would put at least 7 of the 1-inch strips and 25 of the 1/4-inch strips. Be more generous if you can be, so the students can make mistakes and not worry about using their paper efficiently.
- Print the worksheets and supplemental figures. Be sure that the printer is scaling the figures correctly - I use the 100% scale when printing mine. Each group should only get one copy of the supplemental figures, but you should print as many copies of the worksheet as makes sense for your class.
- Now, you're going to create demonstration figures.
- Tape together 4 pieces of white paper to form an extra large sheet. Alternately, you could find kraft paper.
- Draw axes with a thick black marker, and measure out tick marks one inch apart on each axis. I put my origin near the lower left corner.
- Draw lattice points with y values (between 0 and 11 inclusive) at each integer x value, for 3n+1 x values, for some natural number n. It's okay if you don't quite use the entire width of your paper.
- Using these points as a guide, draw an abstract but smooth graph of a function that goes through each point.
- Repeat the first step 3 more times (so you have 4 extra large sheets in total) and trace your figure onto these sheets.
- Color in your figure from your first sheet.
- Using the same color you used for your 1-inch strips, cut 2-inch strips, and cut them to the height so they form a left-hand approximation of your figure. Your figure will divide evenly into 3 since you have a 3n+1 x-values, and therefore 3n intervals.
- Using the same color you used for you 1/4-inch strips, cut 1-inch strips so they form both left- and right-hand approximations for your figure. Glue these (just the 1-inch ones) onto your figures.
Now, you should have 4 sheets: one with a colored in figure, one which is blank, and two with 1-inch approximations.
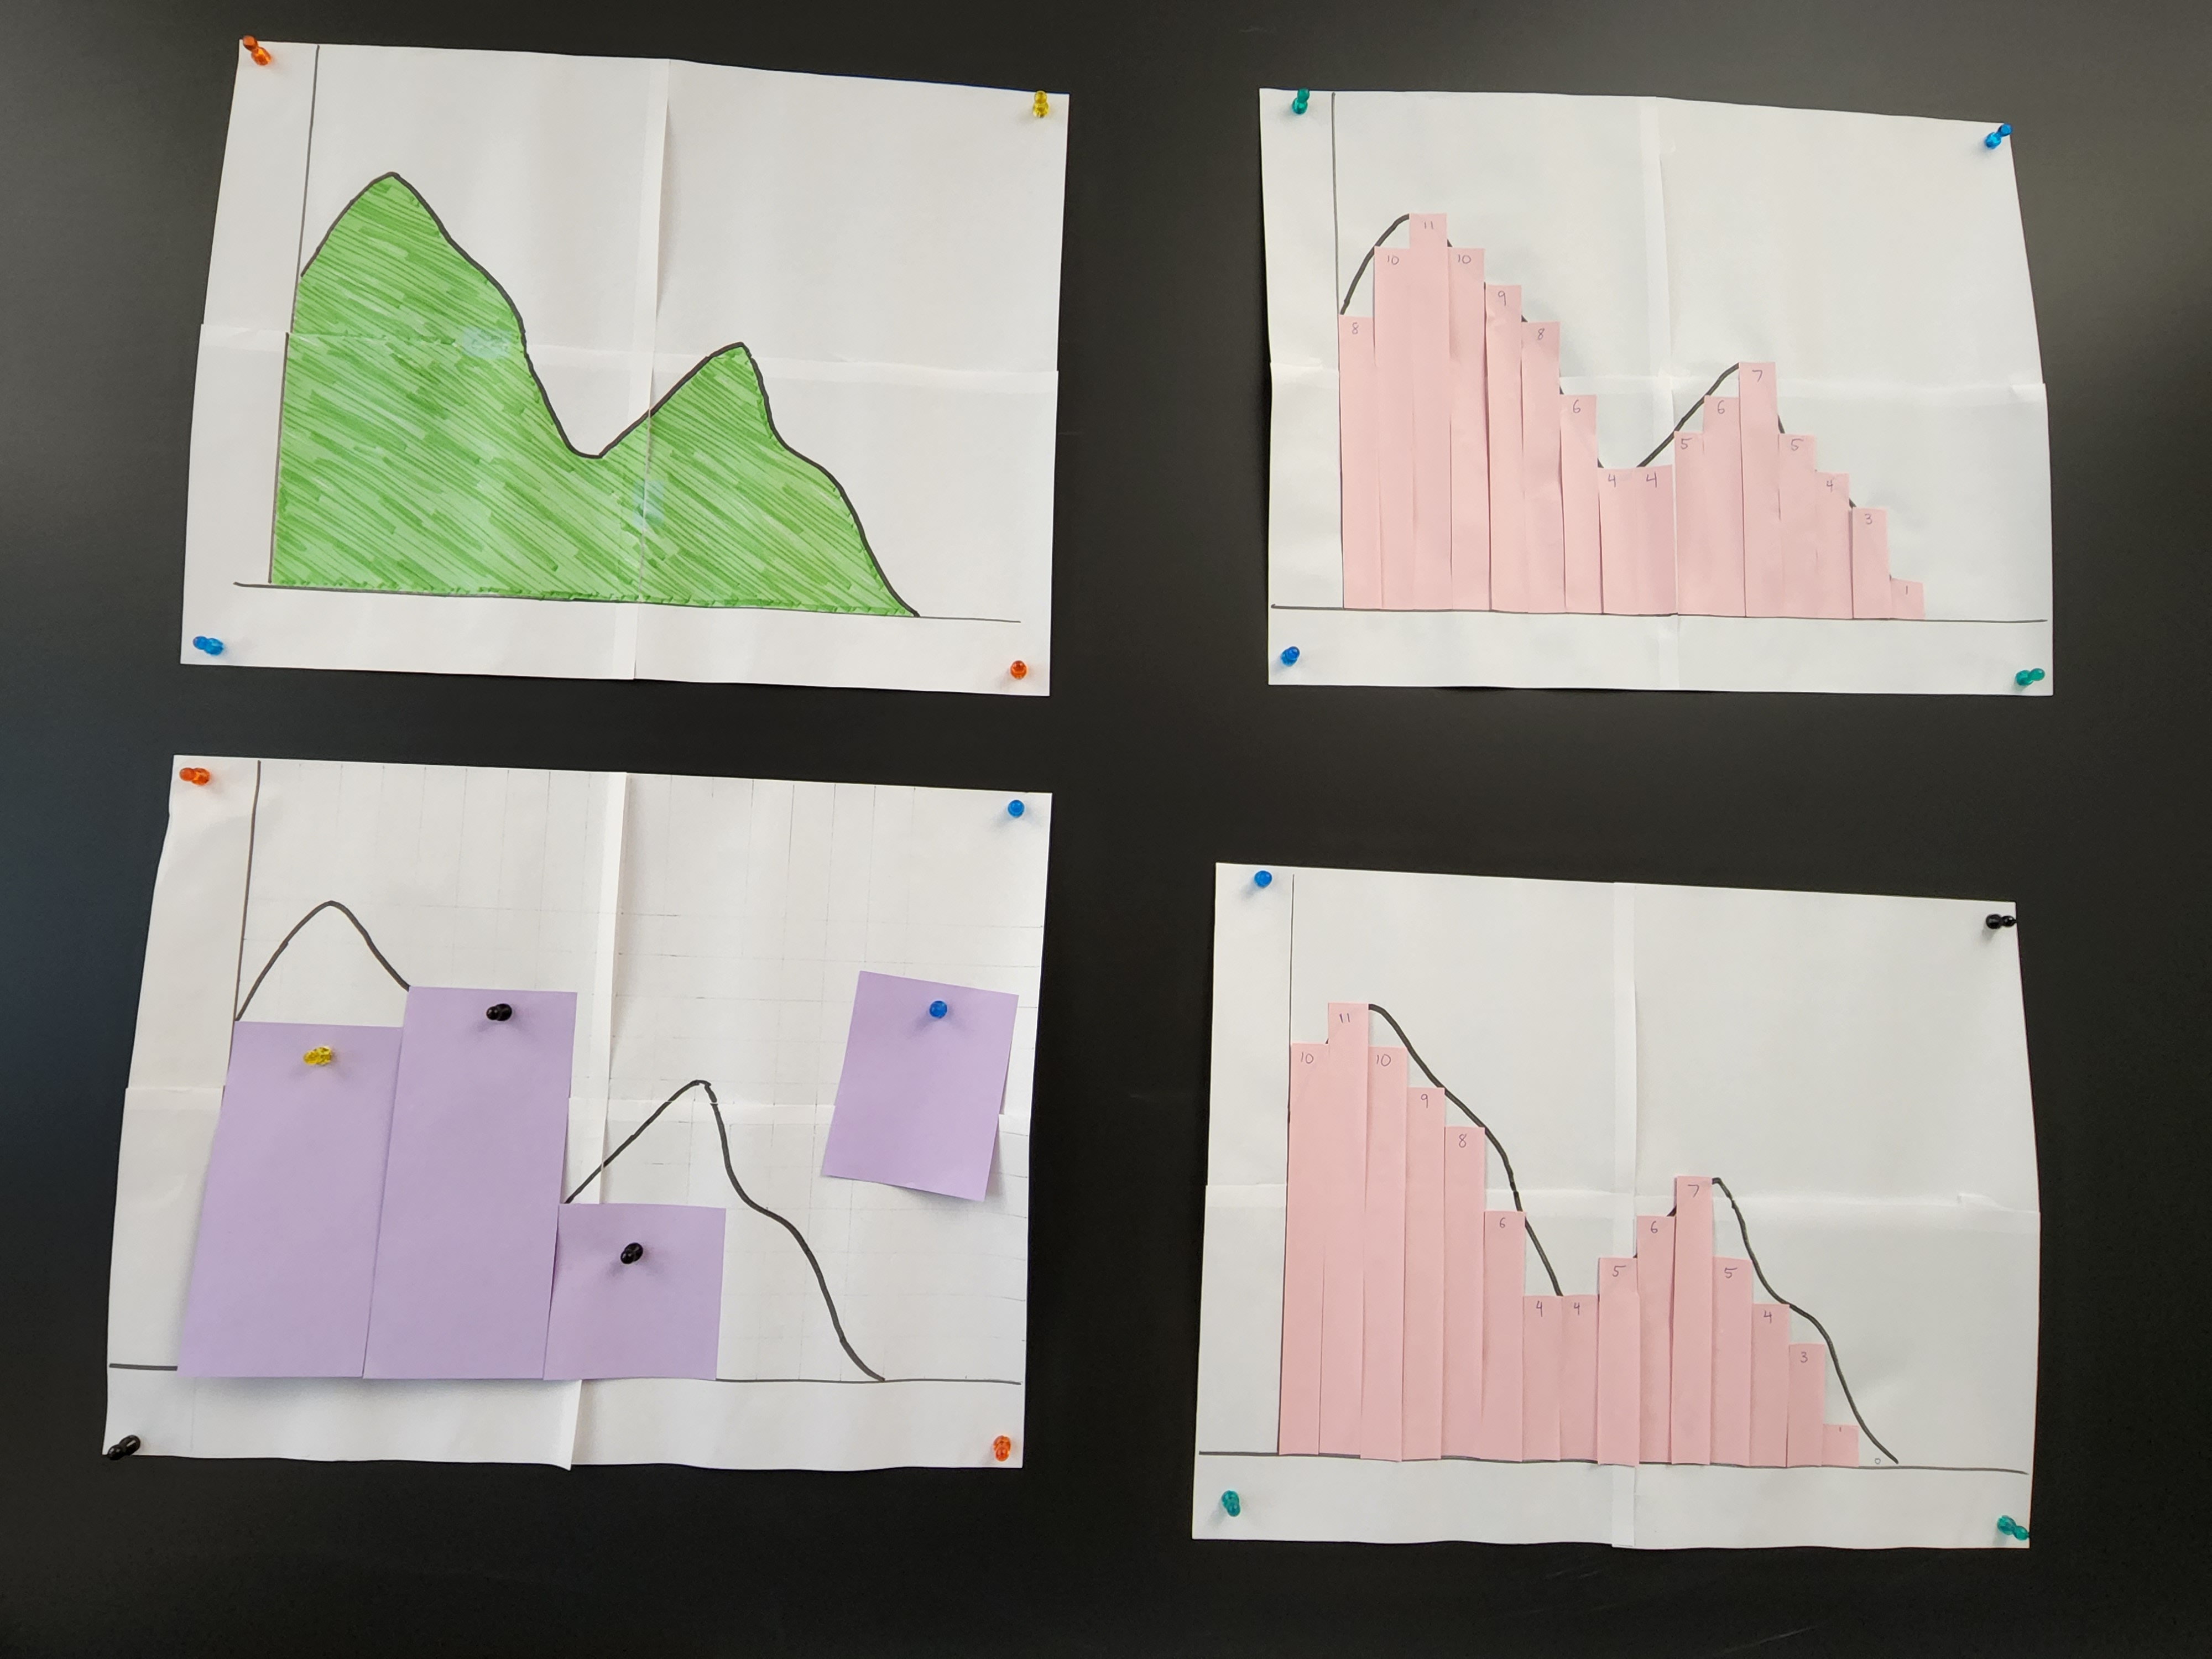
- Compute the Riemann sums of the demonstration figures, and keep note of the summands.
- Consider making an answer key for your activity, so you can flash it to students if they're unsure of the objective.
- Pack everything into a box to bring to class!
In Class
- Before class, deposit one of each item (glue stick, scissors, ruler, one of each type of envelope) at each group area.
- Explain the general idea of Riemann sums to the students. Use the demonstration-sized model to assist with this, and give the students a better idea of what to expect during the activity.
- Show them the colored-in figure, and tell them you want to approximate the area (use magnets to attach it to the board).
- Bring out the blank figure, and fill in the approximation by using the magnets to secure the 2-inch strips in place while explaining where the heights came from. Tell them the dimensions of each rectangle, and compute the approximate area.
- Show them the 1-inch right-hand approximation, tell them the total area (don't waste time showing them the addition), and have them agree that it's a better estimate.
- Point out that there was no reason to use the right instead of the left, and magnet the left-hand approximation to the board.
- Tell them they're going to do the same thing in today's activity. Point out that it will be much easier to complete the activity if they glue their paper strips down, and that their answers will be approximate/differ slightly from their neighbors' and that's okay!
- Hand out the worksheets, and do your group work thing!